Pouring cement can be a really intimidating thing. To be honest, it scared the crap out of me until I got to see it first hand. Within a few minutes I had jumped in and was working alongside the guys having loads of fun. THEY weren’t having any fun because they had all done it a million times, but I sure was!
So let me be the first to tell you, you can absolutely pour your own cement footings. It’s not hard, it’s just physical work. However, if you choose to hire someone for this part that’s okay too. As the general contractor, you will need to be there for at least part of it. The more you are there supervising, the easier it is to handle or avoid problems and confusion.
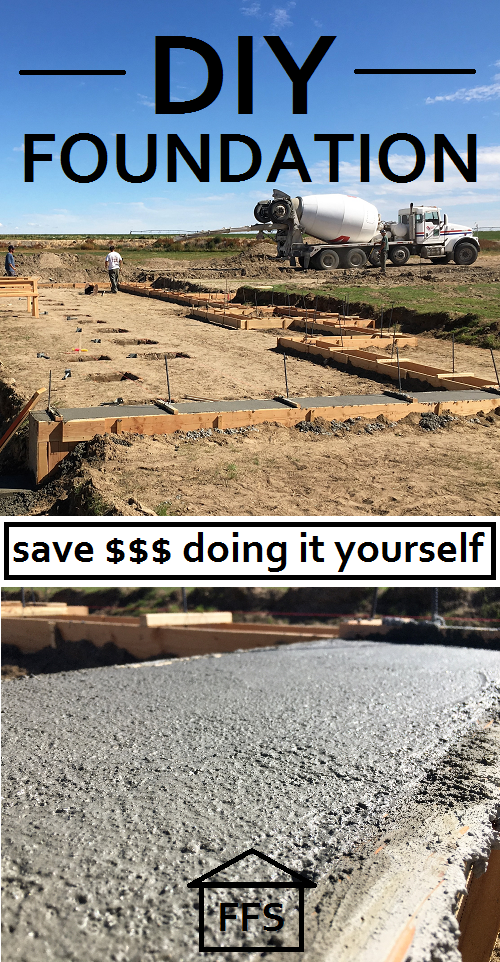
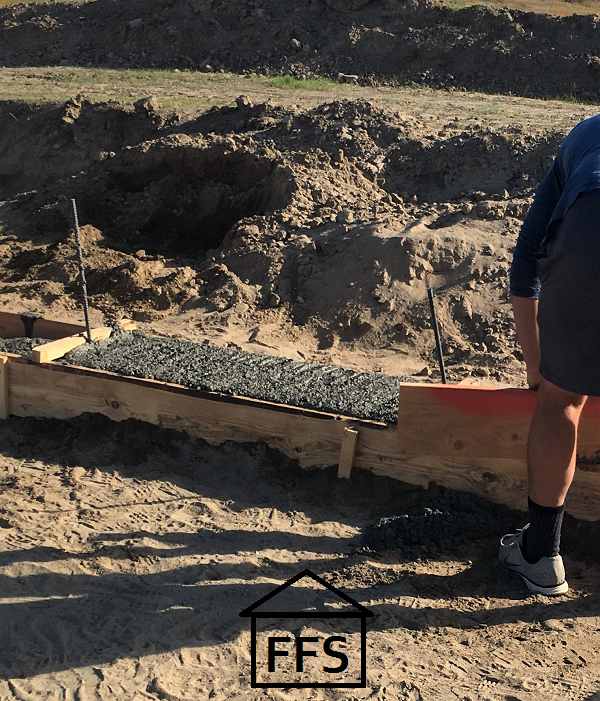
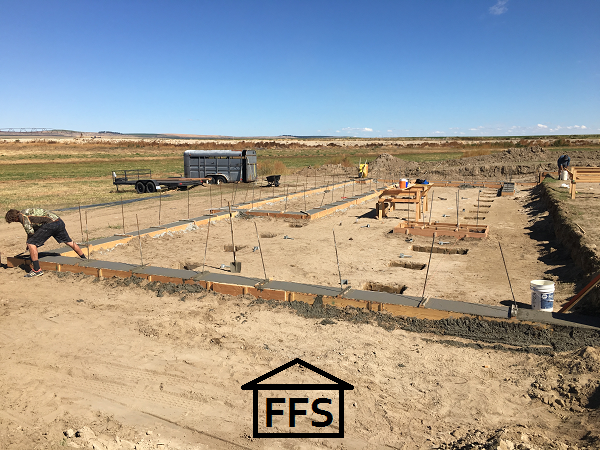
In case you are new here, or you missed the last few steps, BEFORE you pour your foundation footings you are going to need to set up your forms and lay your rebar. You also have to pass an inspection before you bury everything in permanent concrete. It’s also a good idea to read through step 14 which tells you everything you will need to do, and have, to be ready for concrete. You should already have the tools necessary, and the concrete ordered. Make sure you have PLENTY of help, you do not want to get caught in a concrete emergency. I know this from experience.
All caught up? Good! Let’s pour some concrete…

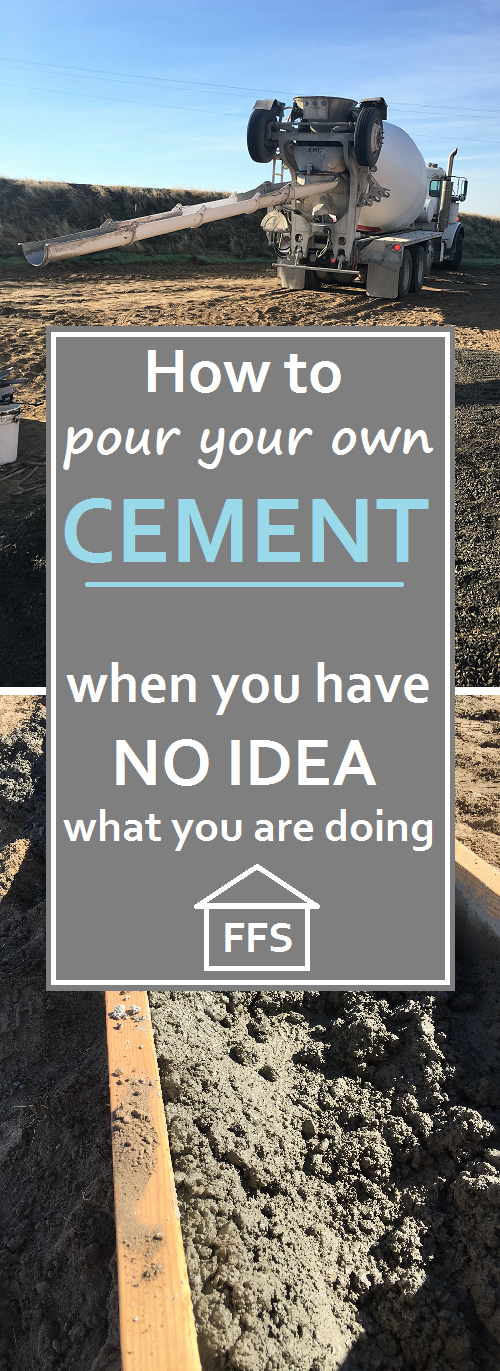
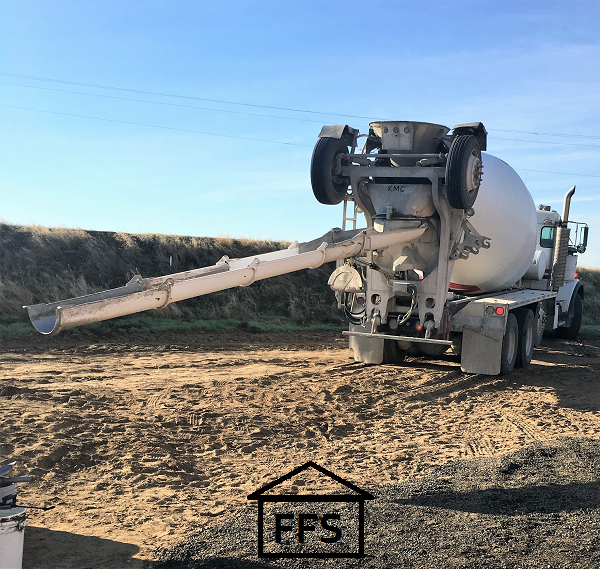
Concrete trucks are not all the same. Some pour out the front and some pour out the back. Josh and Matt were used to the front pouring trucks and didn’t like the back pouring ones because they seemed harder to maneuver. If the boom comes out over the top of the cab, then the driver can control it from his seat. If the boom comes out the back, the driver has to get out of the truck to control the boom and back in the truck to move it around.
The “boom” is the metal shoot that allows the wet cement to slide out of the truck and into the right spot. It can be swiveled around and raised and lowered, but it always has to be tilted downward for gravity.
With a standard cement truck you can not pour upwards. The truck must be parked on higher ground, and the boom must be angled down.
The boom on this particular cement truck was only 13 feet long, so we couldn’t reach the spot footings or the fireplace footings. We saved those for later when we would have a pump truck there to help pour the stem walls. Make sure to find out how long your boom will be so you know if you can reach everything you need to.
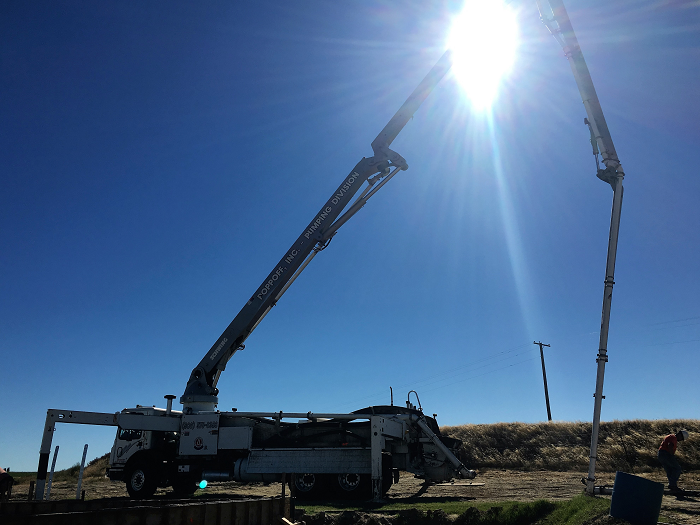
A pump truck is used in addition to the cement truck. It pumps the cement straight up a tube that reaches nearly 100 feet in the air, then drops it down a flexible tube allowing you to pour your cement in hard to reach places.
For our foundation footings we did not need a pump truck. The standard cement truck was able to drive all the way around our foundation to pour the 8″ tall footings.
However, we did need a pump truck to pour our stem walls (the skinnier and taller cement wall that sits on top of your footings) because they were too tall for the standard cement truck to use gravity to pour into them.
**As a side note ** the cement truck and the pump truck are often times from different companies. You need to schedule them ahead of time so that they can coordinate with each other to be there at the same time.
In this step we will be going over pouring cement with a standard cement truck. Using a pump truck will be discussed with the stem walls.
One last time, please make sure you have plenty of PEOPLE there to help (4-8+ depending on how big your foundation is) and plenty of WATER there to wash off tools and hands and to keep the mud wet if needed.
Start on an end if you have one. We had a little wall that stuck out into the middle of the house and came to a dead end. That is where we began to pour. If you don’t have an end then pick the hardest spot to get to and get it over with first.
Position the boom over where you want your mud poured.
The first cement that comes out will likely not be the consistency you want. The controller can adjust the amount of water added so that it is as thick or thin as you want it. Extra watery cement takes longer to dry out. Extra dry is really hard to smooth out and dries rather quickly.
Let’s compare it to food since I am hungry right now. Your cement should be similar consistency to oatmeal. Once you hit gravy, you have gone to far. If your dropping globs of oatmeal cookie dough into your forms, better turn up the water. Be sure to mention these foods to your cement truck operator, I am sure he will appreciate your comparisons (wink wink).
Seriously though, part of their job is to help you with the consistency. Just ask them nicely, and they will help you get it to the consistency you need. The cool thing is that it can be adjusted anytime throughout your pour, so if you get the hang of things and start thinking it needs to be changed just let them know.
Now all you are doing is filling up your forms with cement. Fill them to the top with just a tiny bit of extra. You don’t want to waste a bunch by pushing it off, but it’s more of a pain to not have enough. You will end up having to grab shovels full from somewhere else and walking them over to where you need it.
You may end up with a truck driver that kind of does his own thing, or you may end up with one who expects you to direct him when and where to move. Either way, all you have to do is move down the line and fill up the forms.
As you are moving, you will probably need one person in charge of the boom. Sometimes you have to physically hold it where you want it to go. It’s also nice to have that person directing the truck driver. Again, this was a little different with a rear boom instead of a front boom. We needed someone telling the driver when to pull forward and back up because he couldn’t see what was going on really. If it were a front boom, you may not even need that person right there to direct.
You will want to use a shovel to move the cement around. Kind of smoosh it around and poke the shovel in a lot to get rid of air bubbles. You will probably need two people doing this job as the cement pours out.
The next person will follow behind with a screed. We just used a long flat board. It worked fine, but it was heavy. Poor Matt was on the screed the whole time. That’s a workout!
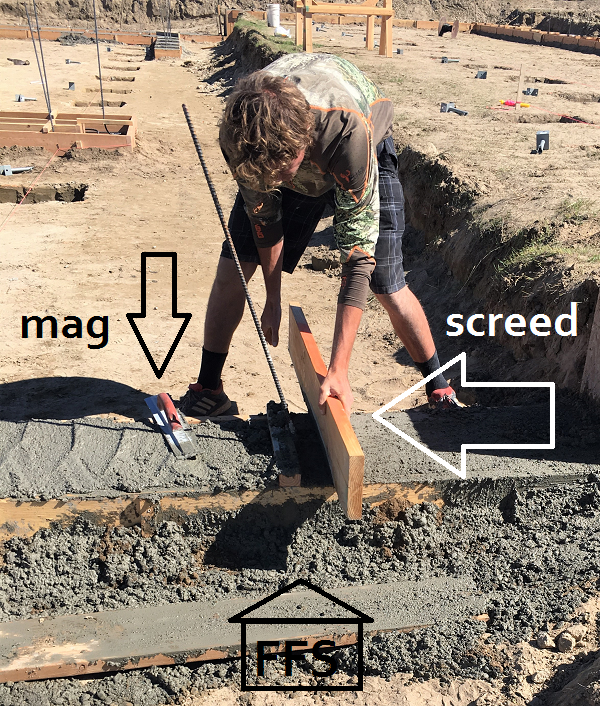
To screed the cement you just run your flat board over the top to scrape off all the extra cement. This is not a “smooth” job though. You have to move the board back and forth over the forms while also moving it forward slowly. You will probably have to run over it a few times, always moving the cement forward, not backwards, so you don’t end up with weird lines or bunches of cement. The more you work it back and forth, the more the cement will settle, and you will be able to smooth it out nicer.
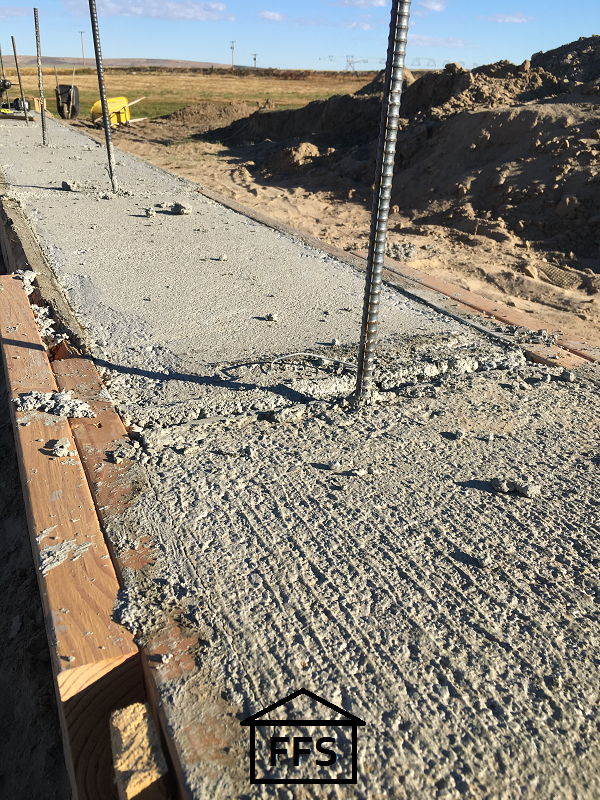
If you have things sticking out of the cement like we did (rebar), just work around them the best you can. You need to make sure your rebar is sticking straight up and out of the center of the forms. Sometimes it will move a little when the cement hits it, so you need to adjust it.
The rebar is supposed to go straight up into the stem walls, so if they get knocked over or shifted to the side, then it sure won’t be helping your stem wall at all.
We also had boards across the top every few feet. These were supports for the rebar and also to help hold the forms together. Just screed right up to them, and try not to bunch up a ton of cement around them.
You want the cement to be as flat as possible. Luckily, the footings will be buried, so this is a great place to practice working with cement for the first time. No one will ever see it if it turns out real ugly. Too bad I have to put pictures of my mistakes on the internet for all of you guys to see. It was my first time too, so be nice! See the ugly part? Ya that was my spot…
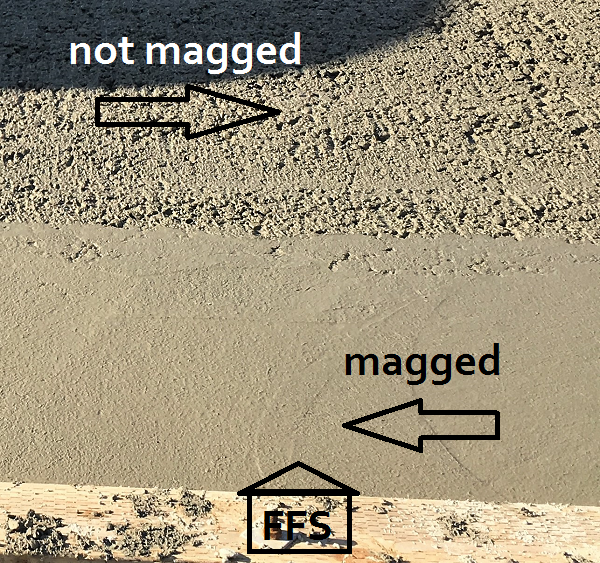
Behind the screed you will need one or two people with mags. This is just the small hand tool that smooths out the top of the cement real nice. There are a lot of different types of mags. I was COMPLETELY overwhelmed when I went to Lowe’s to pick one up. But the nice part is that you are working on the footings. They don’t have to look perfect, they just need to be strong and flat to support your house. We had three different types of mags for this part and they all worked great. If you were working on your front porch or something that needed to look perfect, you might want a specific type of mag, but for the footings just use what you have.
Following behind the screed, the person with the mag simply smoothes it all out. You are going to rub around the top of the cement a whole lot because the mag is designed to pull the smooth stuff to the top and push the rocks down. If you just smooth over it once or twice, your cement will look rough on the top and it will have some unevenness. Work it good until it’s nice and smooth. Then you will be able to fill all the little holes and make the corners and edges nicer.
Keep buckets of water close so everyone can rinse their hands every once in awhile. The mags will need to be cleaned off every few minutes because they get harder to work with if the cement starts to cake on. It also helps to dip it in water and run it over the top just to jump start the smoothing out process a little. It can make it easier to move it around, but is not necessary.
If you need to put anything into your cement (rebar, J bolts, etc), you will do it a few minutes after the mag. Give it a little bit of time to set up before you can expect it to hold something up.
We already had our rebar set and tied up where it needed to go. However, some people just follow behind the mag and poke the rebar down into the wet cement. We were afraid we wouldn’t have enough help on pour day, which is why we chose to tie up the rebar beforehand. You can’t risk NOT getting the rebar in.
If your rebar is already set, then you probably won’t need to put anything else in your footings. The stem wall will most likely need bolts of some kind and maybe straps on the side, but we will discuss that with the stem wall later.
Everyone’s arms will get really tired, especially if you are not used to this kind of work. I was pretty sore the next day and my hands hurt from the cement. This is another reason why it’s nice to have extra help. Switching up jobs can be a really great thing so that one person doesn’t have to do the same job for several hours.
Continue all the way around your foundation footings and back to where you started. When you get to the end, just smooth out the spot where the partially dried cement meets the fresh cement the best you can.
It took us about 5 hours to pour all of the footings. We had 6 people working on it, but only two had concrete experience.
And there you have it. You are now a concrete master! See that wasn’t so hard.
Please please wash your tools very well. Dried concrete will ruin everything, so the only way to be able to use these tools again is to thoroughly wash them.
The concrete truck will need a place to wash out also. It will leave a little pile of cement so consider where you might want them to put it. We had him wash out where the garage was going to be poured in a few weeks.
You will probably need the check ready to pay the guy before he leaves, unless you already paid with a card over the phone. Many companies have a rule that they can’t leave until they have been paid. Just be prepared.
Which brings me to the next subject ….

Cement is sold by the cubic yard. In case you missed the lesson on how to figure out how much cement you need to order, it’s explained in great detail in step 14.
For our footings, we needed 21 cubic yards of cement. Yes, I realize that is a little higher than the number I told you in Step 14. The reason for that is because we were pouring some of the spot footings around the edges, and also because there were areas of our footings that were 9 inches instead of just 8. We ordered a few extra yards to compensate for this.
This is for a 4,000 square foot house with a 700 square foot attached garage. The footings went all the way around the garage, and also around the wrap around deck.
I compaired prices from 3 different cement companies. I tried to get more quotes, but we live in a very rural area, and I could only find 3 companies that would even deliver to me.
The least expensive company happened to also be the ones who were the easiest to work with. I love it when that happens!
AAA Ready Mix out of Moses Lake, WA was cheaper than the two other companies by a few hundred dollars. AND their delivery fee was included in the price per yard. Sweet!
1 cubic yard of 5 1/2 sack cement = $104.50
We ordered 21 yards so $104.50 x 21 = $2194.50
After tax, the total came out to $2,367.86
I really did have a fun time learning to work with cement. I am no longer intimidated by it. In fact, I am considering making my own cement sink for one of our bathrooms because I feel like I understand it now.
The one thing that totally changed how I felt about it though, was seeing it in person. It really only took me a few minutes before I jumped in and started helping. It’s not hard, but it is physical. You will probably be sore the next day.
Don’t be scared to go for it! This is absolutely something that you can do yourself to save money on your home.
Oh ya, congratulations on finally having something permanent on your land! So flipping exciting, isn’t it??
~Farmer’s Wife
CLICK HERE if you need to go back to Step 14
or
CLICK HERE to move on to Step 16
FREE checklists and schedules
Access to the resources I created that helped Farmer and I save over $75,000 building our own custom dream home.
Cement is only an ingredient in CONCRETE.
It is called “Pouring CONCRETE”
Thanks Terry!
I actually asked someone what the difference was and they didn’t know. I appreciate the clarification.
Concrete is composed of cement (binding agent) sand, aggregate and water.
In your previous article you said gloves are a help but not necessary. I’m generalizing because I can’t remember your exact words. I would like to advise to always wear gloves, good work boots that are water resistant and it would help to have more protection on the bottom end of your pants. One of the ingredients in concrete is lime. It is a chemical that can cause burns. My brother was working on a site without proper protection and he got 3rd degree burns on both feet. If you email me I will try to find the picture so you can see and share if you like. But please be careful with concrete because it can and will cause damage to your body. Also to get concrete… cement The ingredients of cement include limestone, shells and chalk combined with shale, slate, clay, silica sand, blast furnace slag and iron ore
Thanks Jennifer for your tips and information!
Another thing to have on hand while pouring is white vinegar. Sounds weird I know, but my son works with concrete a lot and has acquired an ‘allergy’ to cement. He is able to work with the mud and then rinse, as needed, in vinegar to sooth the reaction.
Thank for all the great info! I’m loving it!
Thanks Jenny!
Just a question… is the concrete pumper truck charged for separately (I assume so since you said it sometimes comes from different companies), and how much does it cost as a separate line item? We’re early in the design of our house, and have been considering Insulated Concrete Forms (ICFs) for the walls, and was wondering about additional costs above the per yard concrete cost. Thanks!
Yep the concrete pump is charged for separately. Ours was $650 for 3 hours. They usually have a minimum and then charge by the hour after that.
Our framers told us in Utah it’s a little cheaper, like around $300-$400. I also know in other places less rural around here it’s closer to $1000.
Just call a pump truck company and ask, they should be able to tell you in just a few minute conversation everything you need to know about your specific area.
You really shouldn’t add any water to concrete. Ask for a Retarder if its hot out. Adding water decreases the final strength after curing. Oh and concrete cures it does not dry. It takes 28 days to reach maximum strength. Mixers are front or rear discharge, Chutes are 4 section and 16 ft long. Booms are on cranes.
Floats come 2 ways, magnesium (mags) and steel. Former mixer front discharge mixer driver,
Thanks for the help Craig!
Food analogies. You kill me. 🙂
I am LOVING all of your instructions, guides, and steps. Your humor and wit. Wonderful, just wonderful.
Thank you so much!
You are so sweet 🙂 thank you