After months of getting ready to break ground, you are finally ready to start the actual building part. Unless of course you missed Step 10- preparing to break ground, which you can see RIGHT HERE.
But before we start into all the details about excavating your homes foundation, I want to say a few things. So humor me for a minute ….
People keep asking me how it has been to be our general contractor, how I like building our own house, and if I am going crazy yet. I can honestly tell you, that after months of building I am still having the time of my life! I have loved almost every second of it.
There have certainly been some tough things to deal with, and some stressful days, but for the most part, it has been a blast learning how it really is to build a house. Yes, I said learning. We are absolutely learning as we go, because Farmer and I have never built a house before. But I followed some smart people’s advice by taking our time and planning everything out. It made all the difference that I did my homework ahead of time.
The stressful situations that have come up have mostly been because I didn’t plan something out or we didn’t know exactly what we wanted somewhere.
And it has been …………interesting………… to see how a woman is treated in this position. I didn’t even think about it before we started building, but I quickly noticed it’s not the norm for a woman to be the general contractor. Don’t get me wrong, most people have been very nice to me and treated me wonderfully. But I sure do get a lot of comments. Nearly everyone we work with comments about the fact that I am a girl. So I suppose I am just throwing that out there in case you are a woman and you get offended easily. Don’t let it bother you, just be prepared with some witty comebacks for when the rough and tough construction man says something about you being too delicate for this job. Wink wink
So now that I have some building under my belt, I want to tell you (or remind you of) a few secrets that I have learned.
Secret #1– You can still build a beautiful, high quality, completely custom home, even if you don’t know a single thing about building houses. Really guys, I don’t remind you of my lack of building knowledge all the time for nothing! It is to show you that I don’t know what I am doing either, and things are still working out.
There are things you need to learn, yes, but that is why you have me right? To pass on the need to know knowledge.
You can actually make sure that your home is “over-built” if that makes you feel better. Which means, everything is done…… MORE basically. More strength in your walls, more insulation, more detail, more anything that you want. When you build your own house, even if you don’t do the actually cutting, nailing, glueing, etc, you pay attention to every step and every detail.
So never forget, that just because you don’t know anything about building houses, that doesn’t mean that your house will be low quality or built incorrectly. You will build a better quality house, because it is your house.
Secret #2- There are people out there who will literally walk you through building your own house … you just have to find them. You might think that if you don’t know how to do something on your house then you just need to hire someone. That’s not entirely true. So often, we have been able to find people, even people we had never met before, who were willing to come to our house and talk us through something that we didn’t know how to do. If it’s something they can tell you over the phone, it’s even easier to find someone willing.
We had one guy offer to come to our house site and tell us how to put in our own septic. He said he didn’t have time to dig it himself but he did have time to come tell us how to do it.
Secret #3- The satisfaction in building your own home is beyond what I would have imagined. I LOVE LOVE LOVE that we get to be a part of everything that happens on our family home. My kids get to be there to learn and see what is happening. My seven year old is old enough to help quite a bit. And I get to say “Yes, as a matter of fact I do know how to pour concrete, operate a tractor, make my own hardwood flooring …. ”
I never thought I would feel such a deep connection to this house. It’s just a house right? It may sound totally cheesy, but I really do. And I know that the feeling is amplified because we are doing it ourselves.
Now that I got all the cheesy talk out of the way, let’s get building!
If you have followed all of my steps, planned the best you can, and checked off everything on my ready to break ground checklist, then you are completely ready for this day!
From this point on, I will have “steps” and I will have “days” so that you know what step you are on, and you also know how many days it will take.
For example, this is “Step 11-Excavation” but it will cover “Day 1 – Day 2 of construction”. That way you know that excavation took us 2 days. See how that works?
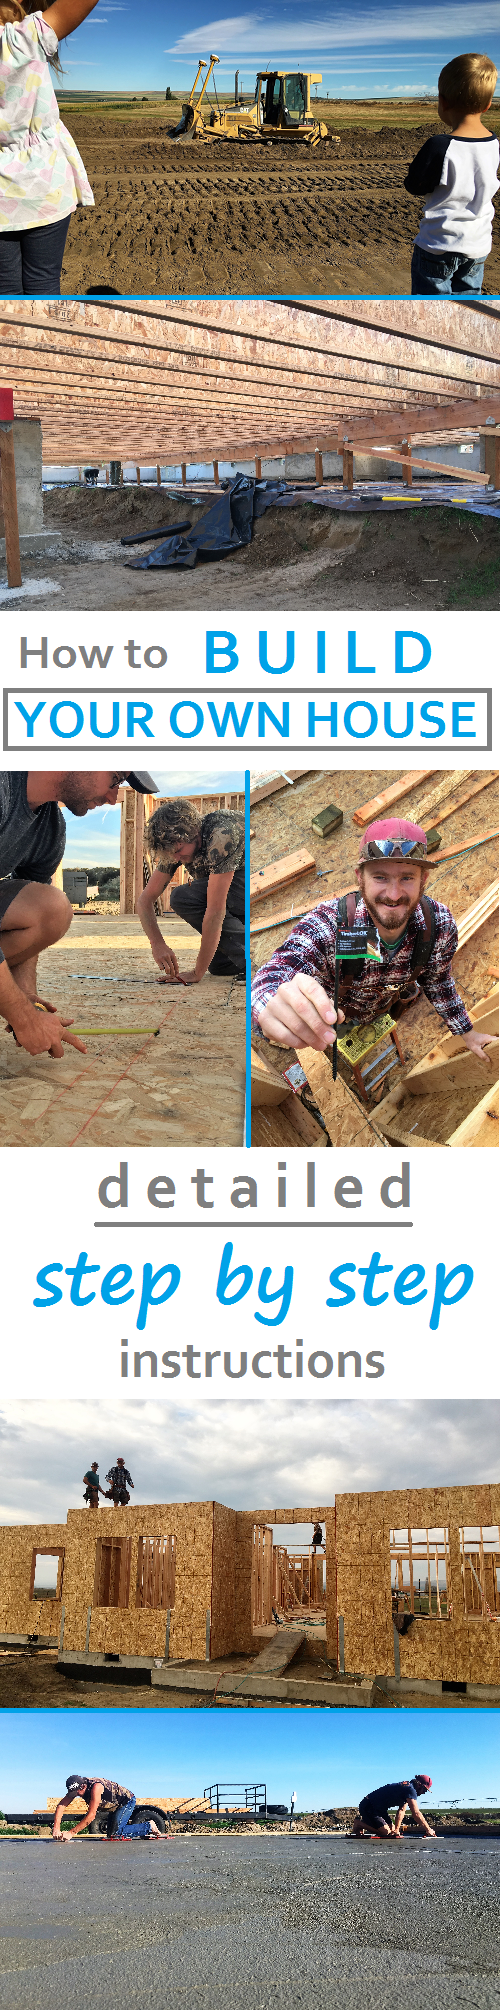
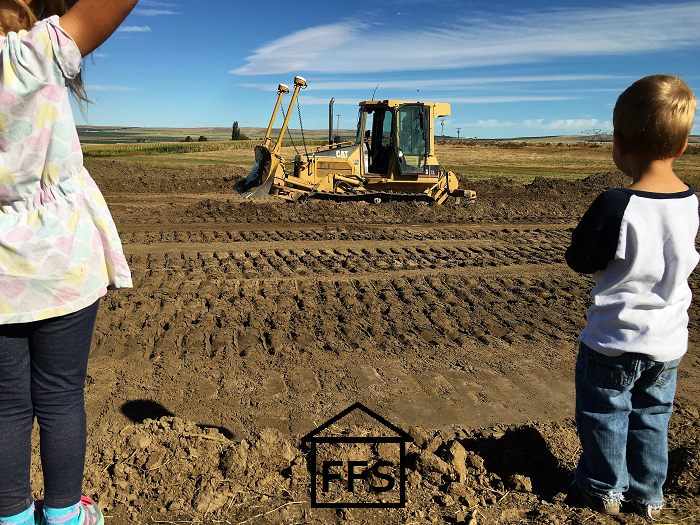
On ground breaking day, show up at least half an hour early. Your house site should be marked out, unless you are having the excavator do that.
There are many different ways to excavate. Mostly it depends on the type of foundation the house will sit on, and the type of soil/rock you are excavating into.
There are all kinds of foundations. Just a few days ago, the guys were discussing a house they worked on that was built on top of stilts. Then they told me about a house they will be working on soon, built out of straw bales, that will probably have a foundation built out of something other than cement.
Each home is different, so the excavation will be different. However, the majority of homes built in the United States are built on top of a cement slab foundation or a crawl space.
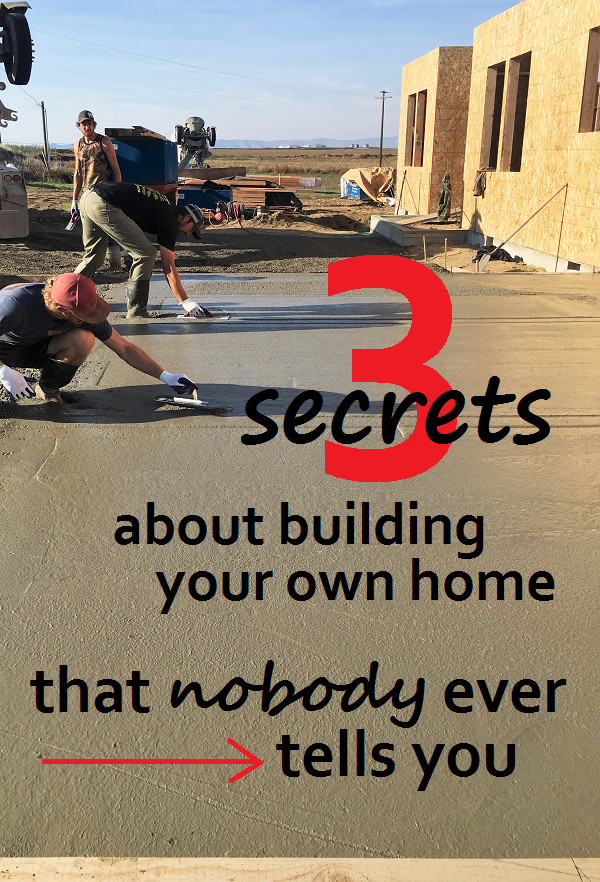
A cement slab foundation is just that, a slab of cement- a giant rectangle (or whatever shape your house is) of cement for your house to sit on. A crawl space is where you pour cement walls around the outside, and then build the floor out of wood on top of that. The idea behind this is that you have a space to crawl under your house to put plumbing, HVAC, insulation, etc under there.
The important thing to remember is that you must have a strong foundation. If your foundation shifts or crumbles, it will effect your entire house and it is not an easy fix.
So, with that in mind, you need to determine what will be the best way to excavate for your particular house.
Some people bull doze the entire thing flat, and then build their foundation forms on top of the dirt. Other people dig carefully with an excavator, only where they will be pouring the cement, which allows them to use the dirt itself as the forms to hold their cement in place.
There are benefits and drawbacks to both.
We actually used a combination of both these options.
Our home has a crawl space underneath it, so if we had excavated the forms out of the dirt, and left the middle of the house undisturbed, then our crawl space would have been full of dirt. Well you can’t very well use a crawl space that you can’t crawl in right? So for our home we bulldozed the whole thing flat.
Our attached garage has a slab of cement for the floor. If we had excavated the foundation for our garage completely flat, we would have had to bring dirt back in to fill it up before we could pour the cement slab floor. We also would have needed extra gravel underneath the slab because the dirt would have been disturbed, and therefore not compacted enough. It was to our advantage to excavate the footings around the garage, and leave the dirt in the middle right where it was.
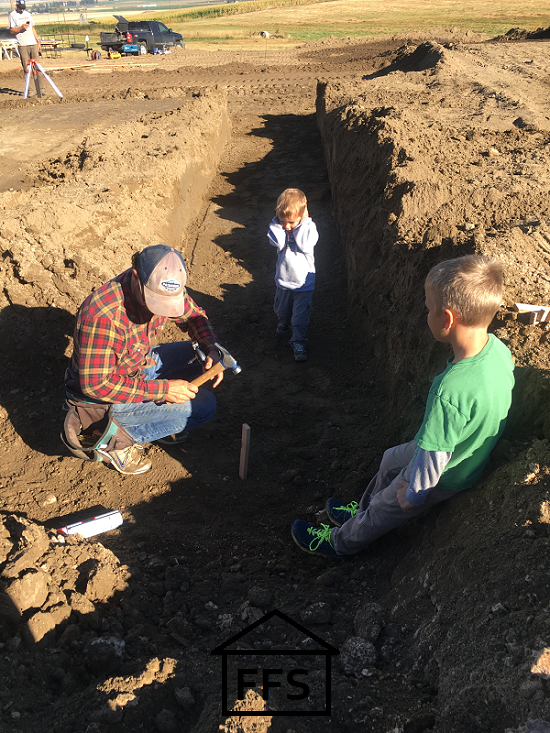
These guys are standing in the trench dug around the garage, with the dirt left in the middle.
Our home is also built on a slope. From the front of the house to the back, it drops about 5 feet. So if we had bulldozed the entire foundation flat, we would have needed to dig down 5 feet into the hill, or bring in dirt to raise the lower side up a few feet. If we brought in dirt, it wouldn’t be native soil, it would be disturbed soil, which is going to settle underneath our foundation. We would have had to take great measures to pack that dirt down sufficiently before we started building on top of it. And even then, it is more risky then building on native soil that was never moved or disturbed.
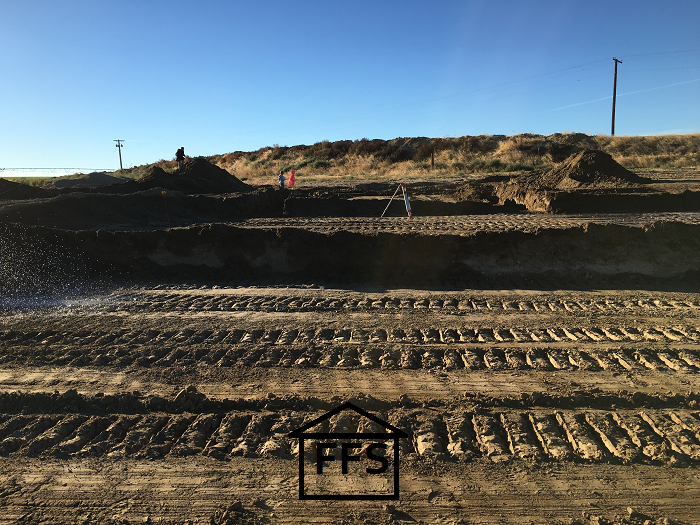
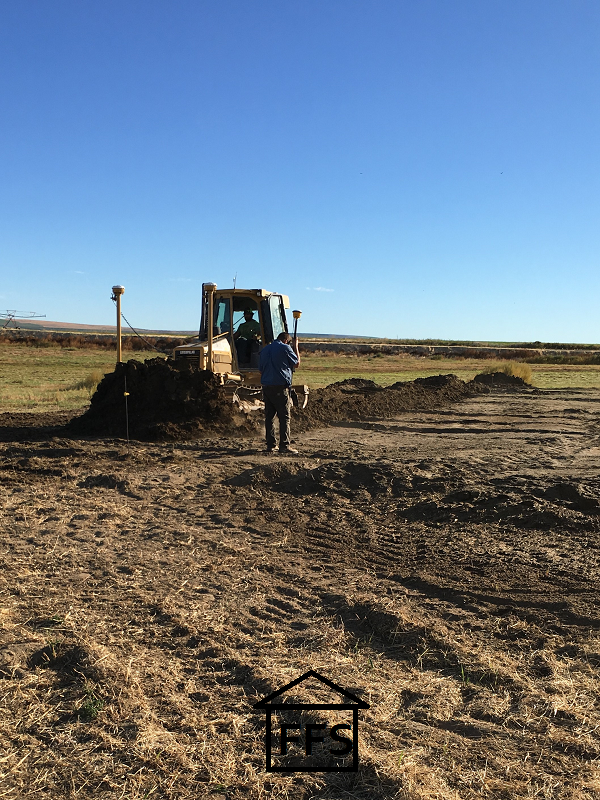
So our excavator suggested that we bull doze on two levels. The top part would have a foundation wall two feet tall, and the bottom part would have a foundation wall four feet tall. That way we wouldn’t have to bring in any extra dirt, and we wouldn’t have to dig the whole thing down so deep.
Here is what it looked like finished with two levels. See the step up in the middle? And the garage is in the very back.
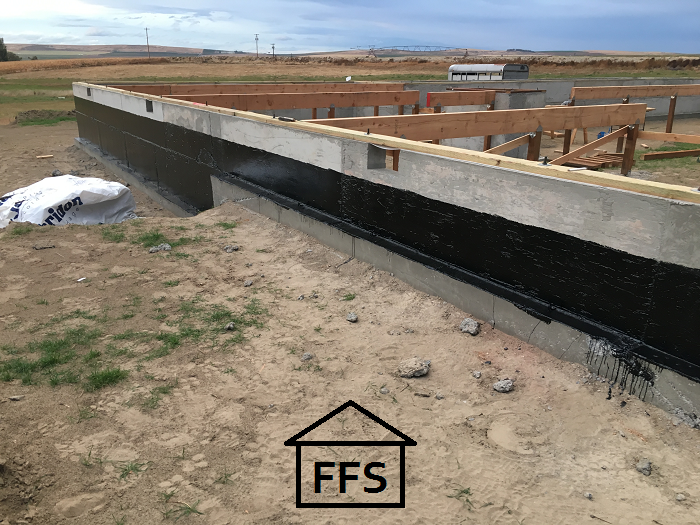
This is what it looked like after we poured the foundation so you can see how the step worked out. 2 foot cement wall on the top part, and 4 foot cement wall on the bottom.
It’s important for me to point out, that we learned all of these things from our excavator guy. If you are hiring someone to do the excavation, ask tons of questions. They will (or should) explain things to you so that you feel pleased with how the excavation is being done.
If you are doing your own excavation, that’s great! Just be sure to do your homework so you can be 100% positive that you are excavating the right way for your home.
We probably would have done our own excavation if we had started at a different time of year. There were a lot of other factors and positives that made us choose to start building in September. However, one drawback of our timing was that Farmer would be right in the middle of harvest season for the first month or two of building. There was no way to realistically plan on him being able to do our excavation.
After our excavation was finished, I can happily say that I am super pleased we didn’t do it ourselves. Not that we couldn’t have done it, but our excavator did an excellent job and was incredibly fast. Our framer said he has never seen a more perfectly level excavation job. And on top of that, he did it in three hours! He pulled in around 8 in the morning and was gone by lunch. Then he came back the next morning for an hour or two and did the garage.
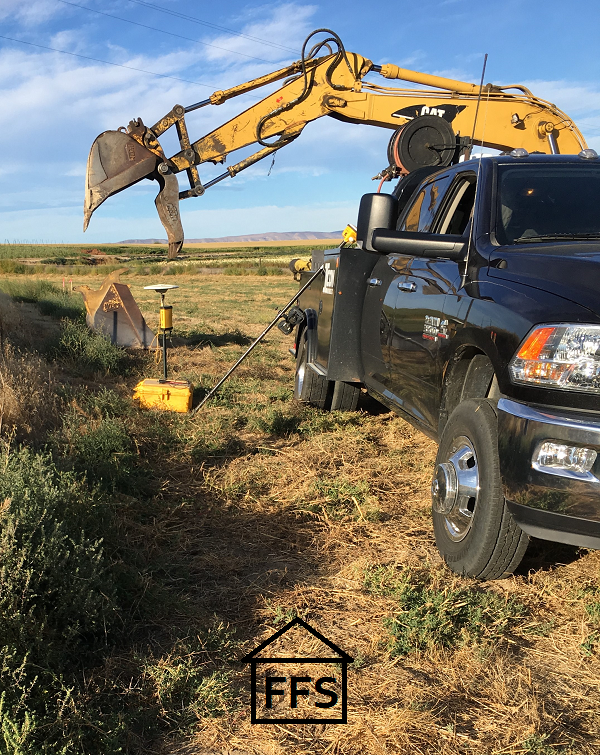
That same thing would have taken Farmer and I a week or two, I am sure. We would have spent a great deal of time trying to get it level, without over digging it. Our hired excavator had GPS on his bulldozer, so he got it all set up and then didn’t have to worry about over digging or even measuring at all because it was all computerized. Talk about efficiency!
This is a picture of them setting up the GPS. It took about 15 minutes.
So if you have hired someone to do the excavation:
- Be there early and prepared with your blueprints.
- Go over things briefly when the excavator arrives. Ask if there is anything you can do to help while he is there.
- Take pictures and be available if anything arises that you can help with.
- If the job is quick, you can stick around. If it takes several days, there is no reason that you need to be there the entire time except to check in every once in awhile. I go to the site every single morning to check in, and then at least one more time throughout the day unless I have a job to do. You don’t need to be there all the time, but as a general rule, everything will be better and faster the more you are there. You can see if they are doing something different than the way you wanted it. You can quickly solve problems and answer questions. And you will feel better because you know what is going on every day at your house.
- When the job is finished, go over everything again with the excavator. Ask if there is anything you need to know or remember when you are getting ready to pour footings. For example, because we excavated on two levels for our house, we would need to remember to build a pillar for cement where the step up was.
 Your excavator should tell you these things if they are directly related to the excavating.
 - Thank your excavator, pay him before he leaves, and have him sign something that says he was paid in full, with the date on it.
- Go home and write it all down. The more you have in writing, the better off you will be if someone tries to cause a problem with you. Include at least the company name, the employee/person who did the job for you, the date, a description of the job, how many hours it took, how much it cost, whether or not you paid in full, and any other agreements you made (trades, payments, etc). It’s a good idea to send a quick confirmation email to them with all of this information too, so they know that you are writing everything down.
If you are doing your own excavation:
- Determine how you are going to excavate. (bulldoze the whole thing flat or dig the footings out of the dirt)
- Make sure the whole thing is marked out correctly. I talked about staking out your house properly in Step 10.
- You will need some way to make sure your finished excavation is level. Some machines have GPS on them so you can program it in, but in most cases you will need a laser level. We bought one at home depot for about $500 and used it a handful of times during the building process. You could probably rent one for cheaper if you don’t think you will ever use it again. Basically, it’s just a laser that uses a beeper to tell you when you are level.
- Figure out how deep you need to dig. Our foundation was going to be 32″ tall, and we needed a minimum of 8″ exposed at the top. So we needed to dig down 24″. Then remember how we decided we would dig one half of the house lower? So on the lower half of the house we needed to add 2 feet to our measurement. We dug the lower half of the foundation 48″. Your blueprints will show you how tall your foundation walls will be. And we learned that 8″ needed to be showing at the top, from the county when they gave us our building permits. You don’t have to be exactly perfect with your depth, but you do need to be level. When you backfill your dirt after the foundation is all done, you will be able to bury it exactly how much you want.
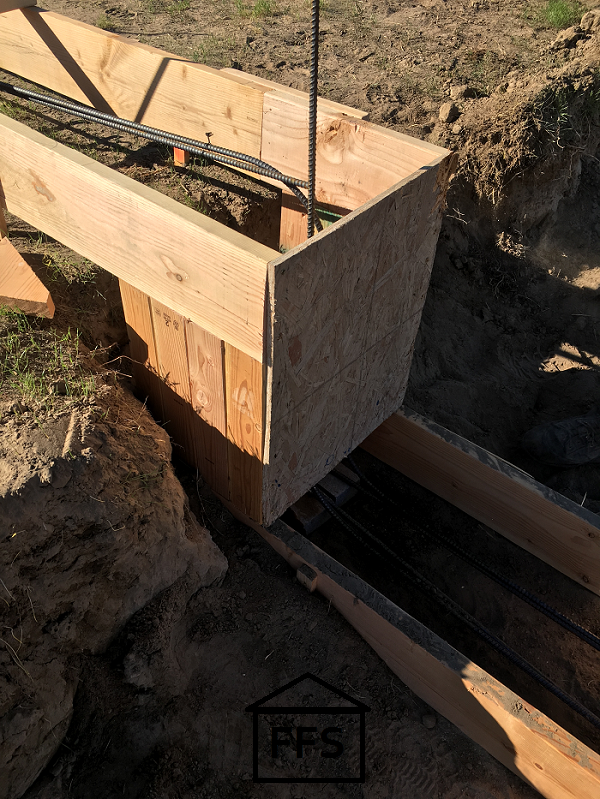
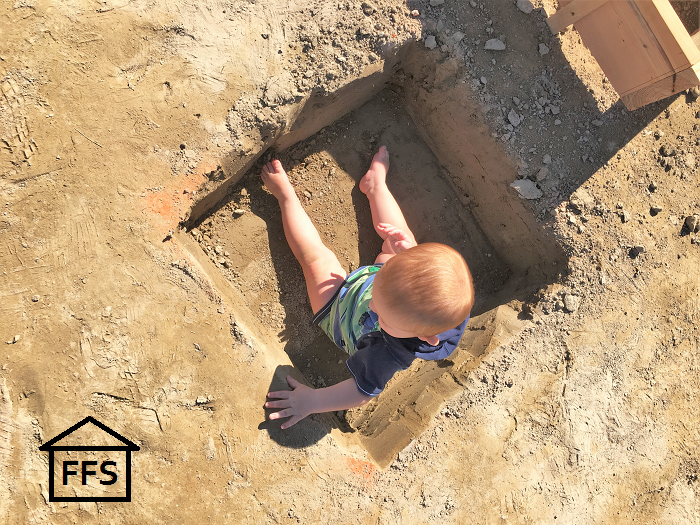
- Study your blueprints to make sure you understand everything that needs to be dug. There may be special areas that call for different things. Our house had several spot footings through the middle that needed to be poured. They were just 2 foot square holes that were 8 inches deep. Super fun to sit in apparently….
 The easiest way to handle those was to dig them out with a shovel and pour the cement straight into them. Your blueprints should have an entire page or two telling you exactly what to do for your foundation. If you have any questions about it, ask someone to come over and look at your blueprints with you before you start excavating.
 - If you are bulldozing the whole thing flat, it is a good idea to bulldoze an area a few feet larger then your house footprint. Since the whole thing is flat anyways, you don’t need to worry about only excavating where your house will sit. Our house was about 80 feet wide. Our excavator bulldozed probably closer to 100 feet. That way we had plenty of room to put up the concrete forms without bumping into dirt walls. It was also nice to be able to drive right up to our work site on level ground, and to have a flat bulldozed area to lay the lumber out.
- If you are excavating your forms right into the dirt then you need to be a little more careful. It will take longer to excavate, but it will save time later because you won’t have to build forms for the footings. You don’t want to move any more dirt then you need to. Spray paint lines on the dirt exactly where you need to excavate. If you use the stakes that you already set out and tie string between them, you will have a nice straight line to spray paint below. Then you will need to do the same thing for the inside of the footings. Your two spray painted lines will probably be around 16″ apart. That is how wide our footings had to be. Try not to over dig, but if you do, don’t worry! You can bring dirt back in and use a compactor to beat the dirt down until it is packed enough to pour concrete on it.
- Double check everything as you dig so you can catch any problems early on. Have someone go over everything with you when you finish so that a fresh set of eyes can help you see if you forgot anything. You wouldn’t want to return your rented excavator only to come back and realize you forgot to dig something.
- Return your machinery (if it was rented or borrowed), go home, and write it all down. Include where you got the machinery from, how long you had it, how much you paid for it, whether or not you paid in full, and any other agreements you made (trades, payments, etc).
Plan ahead so you know everything you will need the excavator for. Big machinery like that is not cheap, and sometimes the most expensive part is transportation. If you can get all of your digging done at once and not have to bring the excavator back out several times, it will save you a lot of money.
In our case, we have a few friends with mini excavators so we didn’t worry about digging our trenches at the same time. We didn’t have a well yet, and we weren’t ready to trench for our electrical or our septic system yet. It was suggested to us to wait to put in our septic until after all the big machinery was done driving around. Apparently they are pretty easy to break.
However, in some situations it would be better to do all of these things at once. Ask the excavator what the cost is just to bring his equipment to you. Then you will be able to gage what is best for you. Sometimes you can dig the trenches even if you aren’t quite ready to put in the stuff that goes in the trench. Just be careful with an open trench on the property.
We live in a tiny town about 45 minutes from any cities. So to bring equipment out, it’s a pretty long drive. We were quoted at around $300 just to bring an excavator out to our property. I would hope that in a city it’s a little cheaper, but I don’t know for sure.
So, the final numbers for hiring an excavator are …..
Time – 3 hours bulldozing, 1 hour digging the garage
Price – A really great friend did us an incredible favor and excavated it for a trade. Trades rock! We still haven’t finalized the deal so I can’t give you exact details, but I can tell you what the next cheapest company quoted me.
Excavation on a 4,000 square foot house …………………….. $2,100
Backfill and compacting …………………………………………….. $1,500
Garage, driveway, patios, gravel included ……………………. $2,400
Waterline trench + install ………………………………………….. $750
Electrical trench ……………………………………………………….. $650
Septic system + materials and install ………………………….. $8,500
Total ………………………………………………………………………. $15,900
If we had done it ourselves …….
Time – About 1 week
Price – Renting an excavator would have cost us around …………………………………………………………………………………………………………………$1000
Farmer has a loader tractor with a bucket so all backfilling, grading flat, and trench work could have been done for the price of fuel …… $150
Laser level ………………………………………………………………………………………………………………………………………………………………………………….$500
Since I am comparing it to the numbers above, the materials to set our own septic system and waterline came out at ………………………….$2293.16
3 loads of gravel delivered …………………………………………………………………………………………………………………………………………………………….$576
Total …………………………………………………………………………………………………………………………………………………………………………………………..$4,519.16
It’s pretty obvious that the cost savings to doing your own excavating is quite large. But I know how scary it is to think about driving a piece of equipment that you know nothing about. Which is why I created a video on that very subject for you, and put it on the videos and tutorials page. It was my first time operating the bucket so you can see a true rookie learning!
If you knew how to drive large machinery would you do your own excavating? Maybe, maybe not. But at least you can see how truly easy it is so you can make that decision. Not every piece of equipment is the same to drive, just like not every car is the same to drive. But you will be surprised at how easy it is to learn. If you can drive a car, you can drive a tractor.
CLICK HERE to go to the videos and tutorials page so you can save $11,380.84 by doing your own excavation!
Now you have broken ground, it only gets more exciting from here!
~Farmer’s Wife
CLICK HERE if you need to go back to Step 10: Preparing to break ground
FREE checklists and schedules
Access to the resources I created that helped Farmer and I save over $75,000 building our own custom dream home.
I have to say that I am very impressed with your thoroughness. I am a female building inspector here in my little community in Canada. Our biggest complaint is always the lack of planning on the part of the people making the biggest investment of their lives! As you stated in one of your posts we are there to help you make a better product. After all the more successful you are the easier our job is! Most people don’t seem to realize the we are reviewing and inspecting based on Building Code, which is a MINIMUM standard!
So way to go! And thank you for sharing your knowledge! It is a very exciting time and I am so glad you are enjoying and getting as much as you can out of the process. You will be amazed going forward how many times you will rely on this new found education!
Thank you for that nice comment Dawn. I completely agree!
HI! I just started reading your blog. My husband and I are getting ready to sell our house and we have really been wanting to build our our home but don’tknow Much about building. I am really encouraged by your blog and just wanted to thank you for taking the time to post all of this great information.
You are welcome Hannah! Thanks for the nice comment and best of luck!
Thank you so much for sharing your knowledge & what you have learned in this process. You have inspired us to be an owner builder after seeing that the builder we were going to use charged around $50K to help us & all the house plans we wanted were “over budget”. I’m looking forward to purchasing your PYH course tomorrow & getting started. You are an inspiration & answer to prayer! 🙂
Thanks for that sweet comment Alison, best of luck!